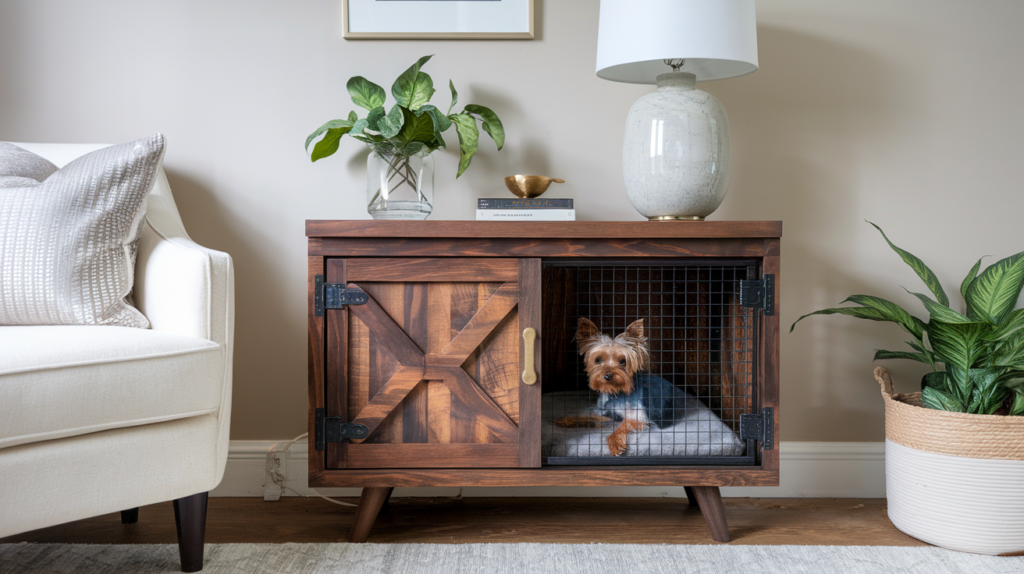
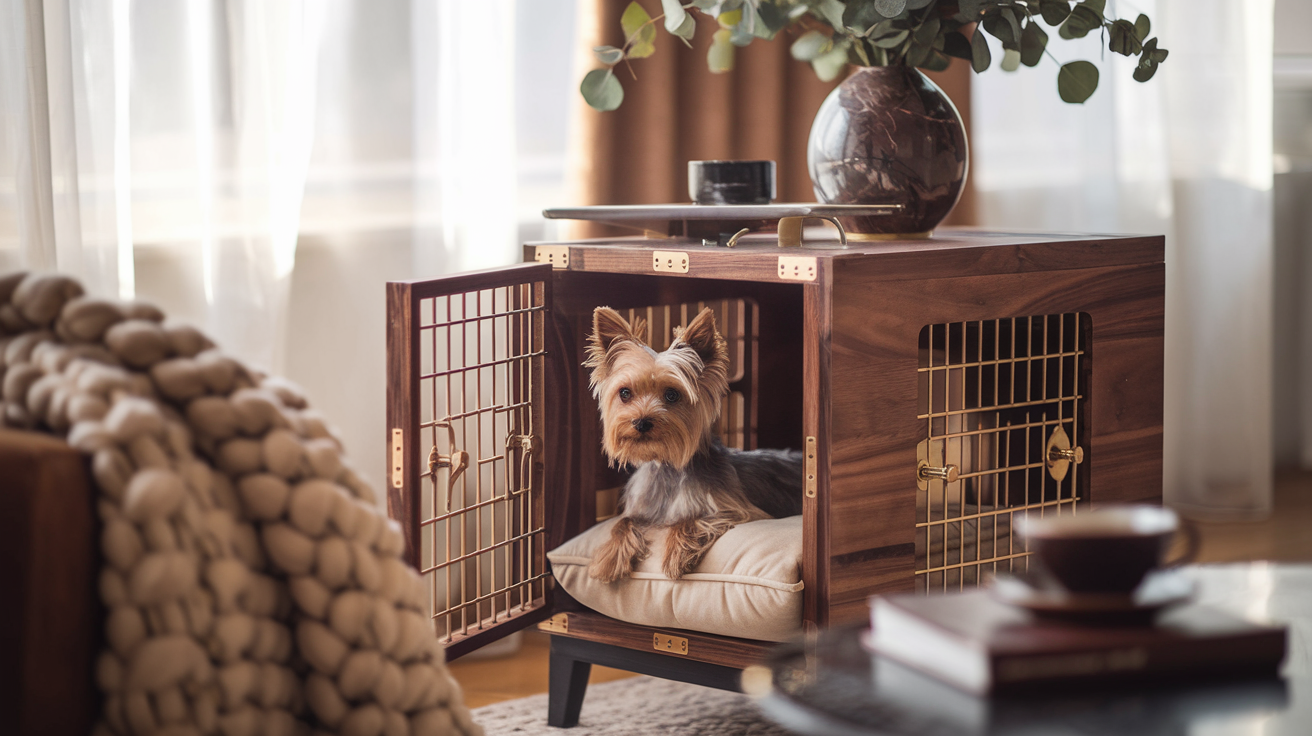
Are you a UK dog owner looking for a space-saving solution that combines your pet’s crate with a stylish side table? Building a DIY dog crate side table is the perfect weekend project to create a functional and attractive piece of furniture for your home.
Key Takeaways:
- Save space by combining your dog’s crate with a side table
- Customise the design to match your home’s style
- Use eco-friendly materials and non-toxic finishes
- Easy to clean and maintain for long-lasting use
Introduction
Building a DIY dog crate side table offers numerous benefits for UK dog owners. Not only does it provide a dedicated space for your furry friend to rest and relax, but it also serves as a functional piece of furniture in your home. This guide will walk you through the entire process, from planning and preparation to the final touches, ensuring that you create a stylish and practical dog crate side table that meets your needs.
Planning and Preparation
Before diving into the construction process, it’s essential to plan and prepare for your project. Start by measuring the space where you intend to place the dog crate side table and consider the size of your dog’s crate. Standard UK dog crate sizes include:
- Small crate: 61 x 46 x 48cm
- Medium crate: 76 x 53 x 61cm
- Large crate: 91 x 61 x 71cm
Choose a table height that complements your interior design, typically between 55-65cm. Consider incorporating recycled or repurposed materials to align with the UK’s growing interest in sustainable living.
Materials and Tools
To build your DIY dog crate side table, you’ll need the following materials:
- Plywood or MDF sheets
- Wood screws
- Hinges
- Wood finish or paint
- Wire crate
- Wood trim
Don’t forget about the essential tools:
- Power drill
- Circular saw
- Measuring tape
- Spirit level
- Screwdriver
- Sandpaper
When sourcing materials, consider UK suppliers like B&Q, Wickes, or Homebase. Look for eco-friendly options, such as reclaimed wood or low-VOC finishes, to minimise your environmental impact.
Detailed Building Plans for Your DIY Dog Crate Side Table

Materials List
Wood Components
- 2 × Side panels: 18mm plywood (600mm × 600mm)
- 1 × Top panel: 18mm plywood (600mm × 450mm)
- 1 × Bottom panel: 18mm plywood (600mm × 450mm)
- 1 × Back panel: 18mm plywood (600mm × 600mm)
- 2 × Door frames: 44mm × 18mm PAR timber (cut to size)
- Decorative trim: 18mm quarter round moulding
Hardware
- 1 × Wire mesh dog crate (standard medium size)
- 2 × Cabinet hinges
- 1 × Magnetic catch
- 1 × Door handle
- 40 × 30mm wood screws
- 16 × 15mm wood screws (for hinges)
- Wood glue
- 4 × Corner brackets
Optional Components
- 4 × Furniture feet or castors
- Additional shelf (450mm × 400mm)
- Drawer runners and components
Cutting List
| Component | Material | Quantity | Length (mm) | Width (mm) | Notes |
|---|---|---|---|---|---|
| Side Panels | 18mm Plywood | 2 | 600 | 600 | Main structure |
| Top/Bottom | 18mm Plywood | 2 | 600 | 450 | Main structure |
| Back Panel | 18mm Plywood | 1 | 600 | 600 | Main structure |
| Door Frame | 44×18mm Timber | 4 | 580 | – | Cut to fit |
| Door Panel | Wire Mesh | 1 | 560 | 560 | Cut to fit frame |
Step-by-Step Construction
Phase 1: Preparation
- Cut all panels to size according to cutting list
- Sand all pieces with 120-grit, then 240-grit sandpaper
- Mark screw positions on panels
- Pre-drill all screw holes to prevent splitting
Phase 2: Basic Assembly
- Create Base Frame
- Attach side panels to bottom panel using wood glue and screws
- Ensure corners are square using a carpenter’s square
- Reinforce corners with brackets
- Add Top Panel
- Apply wood glue to top edges of side panels
- Position top panel, ensuring equal overhang
- Secure with screws through pre-drilled holes
- Wipe away excess glue immediately
- Attach Back Panel
- Stand unit upright
- Position back panel
- Secure with glue and screws
Phase 3: Door Construction
- Build Door Frame
- Cut timber to size for door frame
- Create rebate for wire mesh
- Assemble frame with glue and screws
- Cut wire mesh to size
- Secure mesh within rebate
- Door Installation
- Attach hinges to door frame
- Mount door to cabinet
- Add magnetic catch
- Install handle
Phase 4: Finishing
- Add Trim
- Cut decorative trim to size
- Attach with brad nails and glue
- Fill nail holes with wood filler
- Final Touches
- Sand all surfaces
- Apply chosen finish
- Install furniture feet/castors
- Add internal cushion support if desired
Dimensions Diagram
    Top View
    ----------------
    |              |
    |  600mm       |
    |              |
    ----------------
    450mm

    Front View
    ----------------
    |              |
    |              |
    |   600mm      |
    |              |
    |              |
    ----------------
Safety Considerations
- Ensure adequate ventilation with multiple air holes
- Round all sharp edges and corners
- Use non-toxic finishes and sealants
- Check stability before use
- Ensure door mechanism is secure
- Allow finish to fully cure before use
Maintenance Instructions
- Regular cleaning with damp cloth
- Check and tighten screws monthly
- Inspect hinges and catches
- Refinish surfaces annually or as needed
Customisation Options
- Add storage shelf above crate
- Install side-mounted hooks
- Create additional storage compartments
- Add built-in food/water bowl station
- Install LED lighting
- Create removable divider panel
Construction Guide
Now that you have your materials and tools ready, it’s time to start building your dog crate side table. Follow these steps for a successful project:
- Cut the plywood or MDF sheets to size based on your measurements
- Assemble the main structure using wood screws
- Install hinges and doors for easy access to the crate
- Add ventilation holes for your dog’s comfort
- Sand and finish the wood with non-toxic paint or stain
- Attach the wire crate securely to the base
- Add any additional storage features, like drawers or shelves
Remember to prioritize your pet’s safety by ensuring the table is stable, corners are rounded, and finishes are non-toxic.
Design Options and Customisation
One of the best parts about building your own dog crate side table is the ability to customise it to match your home’s style. Popular design options include:
- Modern minimalist
- Traditional wood
- Industrial style
- Scandinavian
- Farmhouse
Incorporate storage elements like side compartments, top drawers, or display shelves to maximise functionality. Consider adding casters for mobility or a lift-top for additional storage.
Styling and Integration
When styling your DIY dog crate side table, consider how it will integrate with your existing furniture and decor. Add decorative elements like carvings or trim to match your interior design style. Use modular designs that can be easily disassembled for cleaning and maintenance.
In small UK homes, look for ways to incorporate your dog crate side table with other multi-functional furniture pieces to maximize space efficiency.
Maintenance and Care
To keep your DIY dog crate side table looking its best, regular cleaning and maintenance are essential. Use a soft cloth and mild cleaning solution to wipe down the surfaces, and vacuum the crate area to remove pet hair and debris.
Periodically check for any loose screws or hinges, and tighten them as needed. If you notice any scratches or chips in the finish, touch them up with a matching paint or stain to maintain the table’s appearance.
Cost Breakdown
The average cost to build a DIY dog crate side table in the UK ranges from £80 to £150, depending on the materials and tools you choose. To save money, look for discounted or second-hand materials, and consider upcycling old furniture pieces.
Compare the cost of building your own table to purchasing a ready-made option to determine the best value for your budget.
Conclusion
Building a DIY dog crate side table is a rewarding project that combines functionality and style for UK dog owners. By following this comprehensive guide, you’ll be able to create a beautiful and practical piece of furniture that both you and your furry friend will love. Remember to prioritise safety, choose eco-friendly materials, and have fun with the customisation process. Happy building! 🐾


